Saturday, August 12, 2023

Ilford FP4 + HC110 + the Zone System

Last week I loaded a roll of Ilford's FP4 into the Yashica Mat 124G to capture images of Big Lagoon skies. On any given day the skies can go from white puffy clouds to angry grey clouds to humid haze to clear in the course of just a few hours. Regardless of the sky, I am frequently faced with a high dynamic range situation. Dark ground in the foreground and bright sky in the background. Depending on how I set exposure, my highlights can be too bright or the shadows too dark. Hold that thought.

Recently, I've been studying the Zone System. Developed by Ansel Adams and Fred Archer in the late 1930s, the system defines 11 "zones" from pure black with no texture (Zone 0) to pure white with no texture (Zone XI). In the center at Zone V is "middle grey." Light meters return an exposure value based on middle grey (Zone V). The meter does not know the color of the subject. It only knows the value of light reflecting off the subject. That means metering the bright white wedding gown of the bride will return an exposure value based on the meter thinking the gown is middle grey. This will under expose the gown and it will look grey in images. Conversely, metering the groom's black tuxedo will return an overexposed and grey tuxedo because the meter is calibrated to regard all subjects as middle grey. Knowing this, we overexpose the image of the bride's gown (to make it white) and underexpose the image of the groom's tuxedo (to make it black). This yields the results we're looking for. Of course, how much to overexpose or underexpose is the up to the photographer and their level of experience. This is easier in 2023 as most folks are shooting with mirrorless digital cameras which provide instant feedback. Not right? Adjust exposure and shoot another image.

It is a different matter for film and again, this is where the experience of the photographer comes into play and where a bit of knowledge of the Zone System can help.  Each of the eleven steps in the system are one stop difference. Zone V to Zone VI, add one stop of exposure to make the image one stop brighter. Zone IV to Zone III, reduce one stop to make the image one stop darker. Perhaps you want the bride's gown in Zone VII. Add two stops to whatever the light meter provided as the exposure. Perhaps you want the groom's tuxedo in Zone III. Reduce the metered exposure by two stops.

Adams and Archer took this system to the Nth degree and wrote five books on the topic. The two key books regarding dealing with dynamic range were The Negative and The Print. It is in these pages where the idea of exposing the in-camera image for the most important shadow area, then developing the negatives in such a way as to bring down the highlights.  In this way we get the best of both worlds, properly exposed shadows AND highlights. 

Note: I'm not an expert, just an amateur photography who's done a bit of reading on the subject. Hopefully my explanations are at least partially correct.

This leads me to today's post. The idea of the roll of FP4 was to experiment with the "expose for the shadows and develop for the highlights" concept. Turns out easy to explain the process, more challenging to put into practice. Ideally, after you determine what is the important shadow area (that shadow area where you want to see texture and details), you spot meter for that area. Knowing the meter yielded a Zone V exposure, you determine to put that shadow area into either Zone IV (one stop less exposure) or, more likely, Zone III (two stops less exposure). This reduction in exposure to get the shadows right also reduces exposure in the sky by the same amount. On some days this may be all that is needed to tame the. bright sky highlights. On other days the tonal range may still be too much. In those cases, "developing for the highlights" means developing the negative for less time. As will determining exposure for the shadows, experience doing this helps. 

A review of the internet provided a lot of information to get me started and in the end I elected a 15% reduction in development time as I didn't think the dynamic range in the images was too much and the reduction in exposure to account for the shadows helped out with the highlights. To achieve the 15% reduction without having to do public math, the Massive Dev Calculator is a huge help and highly recommended. I have it loaded on my iPad and iPhone. Reductions or additions to recommended development times are easy to dial in. Again, knowing how much to dial in requires experience - Google recommends somewhere between 15%-25% to get started.

The shadow areas in a negative are fully developed by the halfway point of the total recommended developing time. In this case, I developed FP4 (exposed at box speed) in HC-110 at 1+47 dilution at 24C and that yielded a recommended developing time of 7:22. This means that, generally speaking, the shadow areas were fully developed a little over three and a half minutes into the process. Regarding reducing development time, guidance is to not reduce time below the mid-point of the recommended processing time. Inputing "-15%" into the Massive Dev Calculator gave me a total development time of 6:15. In theory this produced well exposed important shadow areas and well exposed highlights.

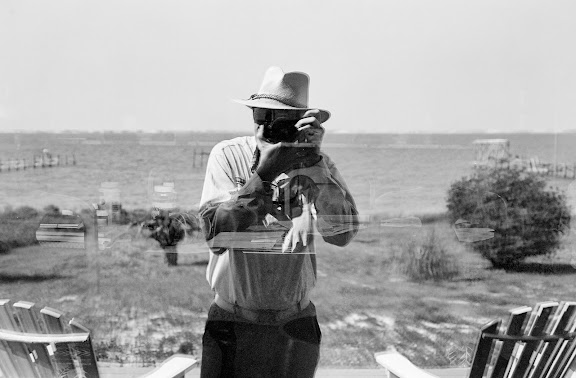
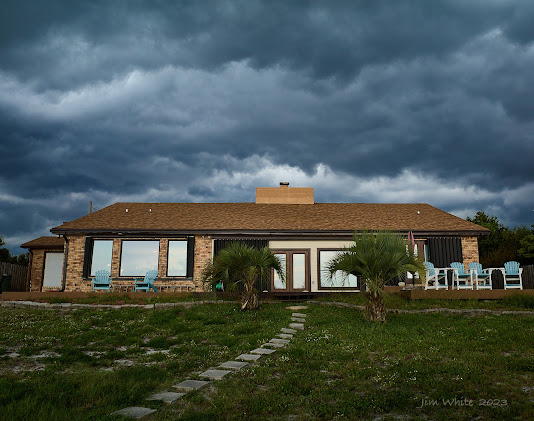
Below are two of the images produced in this process. They were shot a few days apart in very different lighting conditions. In both cases I had the shadow detail I sought, without blowing out the highlights. Film has much more latitude where highlights are concerned, and it is true that dynamic range on both days was well within the latitude of the film. That said, I could see more details in the clouds prior to scanning the negatives. More than I had seen in similar instances of the same scene. The two images below were scanned to be neutral and were then imported into Capture One for digital processing. The sky details, while not as dramatic as shown, were there. Further processing in Silver Efex Pro 3 resulted in the final look I sought for both images.

This was my first experience with reducing developing time to control highlight exposure. Certainly it was not scientific. However, it gave me the confidence to experiment further and the next roll will be shot on a bright, overhead sun summer day with high dynamic range between shadows and highlights. And, I will experiment in a further development time reduction to see how far I can go and still be happy with the images.   


Yashica Mat 124G and Ilford FP4


Thursday, August 10, 2023

Minolta Maxxum 7000

 OMG...did Jim buy another camera? No. I will explain.

My dad was a Canon man for many decades. In fact the Canon FTb QL that I have was gifted to me by dad in the mid-1970s. He had the same camera. Flash forward to 1985 and dad upgraded to the Minolta Maxxum 7000. It is an interesting camera. Per Wikipedia and Ken Rockwell, the Maxxum 7000 was the first truly autofocus (AF) SLR in the industry. There had been a few attempts by Nikon and Canon but apparently Minolta got it right with the Maxxum 7000. Fun fact, these early AF lenses were driven by a motor in the body of the camera. The drive shaft of the motor terminated at the surface of the lens mount. In the lens was another drive shaft which keyed to the camera body shaft. Turning the focus motor in the body rotated the drive shaft in the lens to position the helicoid which focused the glass. Looking at the lens mount on the bodies and lenses of these camera systems you can see the drive shafts. These types of focusing systems can make a lot of noise but they work well. In addition to this Maxxum 7000, my Nikon N90 also hosts the lens focus motor in the camera body and used the same drive shaft arrangement into the lenses. Over the intervening years the motors got small and much quieter and were moved into the lenses themselves. They are also much faster in achieving focus. 

However, regarding useable AF, Minolta started it all with the Maxxum 7000. Minolta named their mount the "A mount." A few years later, Minolta and Konica merged then a few years after that they got out to the camera business. The photographic side was sold to Sony who went on to make very nice SLRs and DSLRs using the Minolta A mount. In fact, Sony finally dropped their DSLR/SLR A mount line in 2021 to focus their efforts solely on mirrorless camera production.

In addition to AF, the Minolta hosts what has become the standard "PASM" lineup of exposure modes - Program, Aperture priority, Shutter priority, Manual. There are also multiple drive modes and you can vary exposure compensation. Pretty advanced stuff back in 1985. 

With regard to the lead in, this was my dad's camera. A few years ago while visiting my sister, also an amateur photographer, she handed over to me a box of old cameras. Along with a Nikon F hosting a 50mm f/1.4 lens (which was CLA'd and sent to my son who loves shooting film through it) and a host of other cameras, was the Minolta Maxxum 7000. The plastic was covered in a nasty white substance and there were missing pieces of plastic on the grip area. Attached was a 28mm lens which was missing a few pieces. Additionally, there was a boxed Minolta 50mm f/2.8 Macro and a boxed Minolta 75-300mm f/4.5-5.6 telephoto zoom.  Given the condition of the camera and the attached lens I placed it on a shelf and forgot about it. 


Flash forward a few years and while cleaning house of unused camera gear I again came across the Minolta. Dusty, covered in the white mung, a few broken areas on the grip, it was in my hand and I was walking to the garbage bin to toss it when I opened the back. Very clean inside. "Hmmm" I thought as I loaded four AA batteries and turned it on. Guess what? The camera fired right up. The 28mm lens was toast and it was tossed. However, the 50mm Macro lens mounted and, after a few minutes of focusing near and far to get the shafts turning again, it seemed to work just fine. I spent an hour or so cleaning the camera then loaded a roll of Ilford XP2 Super and started shooting.

Yesterday I developed the roll of film and this morning I scanned a few of the images. Not bad at all. As far as I know dad bought the camera in 1985. He passed in 1999 and was sick for a number of years prior to his passing. I suspect the camera hadn't been used in nearly 30 years. A few of the images are below. There may be a few focusing issues with the lens as subjects at infinity don't look as sharp as I am used to seeing on film. Much better at closer distances. Haze? Focus issues? Not sure. However, I am very pleased to have not thrown the camera away. Dad's Canon FTb is long gone (although I have his personalized Canon ever-ready case and the Canon telephoto zoom he used) so I am very happy to have this camera. Better still, it works! The various exposure modes worked as designed, there were no light leaks and the auto rewind worked great as well. 

This camera won't become one of my regular film shooters, that status is reserved for the Leica M3 and the Olympus XA2, but I will run a roll through it on a periodic basis when I want AF and auto exposure capability.

Regarding the roll of XP2, it was developed in Kodak's HC-110 using the 1+47 dilution at 24C. I wanted to experiment with contrast control through development and I decreased the recommended developing time by 15%. This gave me a final developing time of 6:10. Happy with the results. In addition to this roll, I developed, using the same contrast control methodology, a roll of FP4 in 120 that was shot through the Yashica 124G. I haven't scanned any of those images yet (the negatives look glorious!) but will soon and report results. 


Tuesday, August 1, 2023

52Frames Update

Wow, I just uploaded my 30th image to 52Frames this year. 52Frames is a collective of interested photographers who commit to upload each week, an image which was captured in that week. Each week has a topic such as, "Meaningful Location," for Week 30. I've written about 52Frames is several early posts. Hundreds of images are uploaded for each week's assignment and I am routinely blown away by the creativity shown by the majority of photographers who participate. Simply amazing. 

Thirty weeks into the year I can state quite authoritatively that my photography has improved. I'm thinking more about composition and framing than I had in the past. I try to take just a few moments more to set the scene in the viewfinder just as I see it in my head. In that process I find myself moving around more to get the scene just right. Again, there are a few added moments before shutter release but I get the image I'm looking for and that's the strategic end goal.

While I believe that prior to 52Frames I had a firm handle on the technical aspects of photography such as the exposure triangle and the many buttons/knobs/dials that are resident on my camera bodies, it is true the past 30 weeks taught me there was more to learn about photography and my cameras.  Earlier this year I wrote about using features in my cameras I had never used and that subsequently I had come to rely on. In some cases, I wasn't putting enough creative thought into the possibilities of how a scene might be captured differently. I'm still an amateur photographer but the assignments of these past 30 weeks caused me to add a few new tools to my camera tool box. Looking back through the portfolio I am pleased with my growth. 

At year's end I plan to put together a photo book containing the 52 images I submitted in 2023 along with the write-ups I provide with each upload. Should be a fun project and a tangible, lasting monument to my first year with 52Frames.

To see my 52Frames profile and images click here - https://52frames.com/photographer/25913

Week 30 - "Meaningful Location"